

What started as a simple idea — turning an old whiskey barrel into a headboard — quickly spiraled into a comedy of errors. The project went from The Whiskey Barrel Project to The I Wish I Didn’t Project before I could even pour myself a whiskey neat. But hey, I don’t believe in mistakes, just lessons… and this one taught me more than I expected.
How It All Started
In an old family shed sat a weathered Jim Beam whiskey barrel, collecting dust for who knows how many decades. It had already lived a second life as a side table (awkwardly tall, I might add) before it finally collapsed during a move — staves scattering across the floor like pickup sticks.
Most people would have tossed the remains. I kept them. Because when you’re obsessed with upcycling, you save everything “just in case.”
That “case” arrived when I decided my bed needed a proper headboard. The broken barrel was about to get a third life.

Making the Lip
I kicked off by building a resting spot for the staves — a “lip.” This lip is where all the whiskey barrel staves would attach and forms the top edge of the headboard.
Using two 2x4s, I created a perpendicular “T” shape — the wider length of one 2×4 attached to the thinner side of the other. I drilled them together with five 3-inch screws.
So far, so good.

Attaching the Staves
Here I hit my first bump. After laying a few staves flat, I remembered the barrel was originally round. A curved headboard? Not exactly what I wanted.
I solved this by alternating the staves face-up and face-down. This flattened the shape nicely and filled in the gaps from the previous layout.

I ended up using almost all the staves, leaving just two leftover (which came in handy later).
Pro Tip: When drilling oak staves, pre-drill your holes to make screwing easier and avoid cracking.
I finished this step with a repeat of the “lip” for the bottom of the headboard. I called it a day here — so far, so good! The rest should be a piece of cake… or so I thought.
The Mistake
In my excitement, I started with the visual part of the project — arranging the barrel staves — before building the frame. This made everything way more complicated than necessary.
Here’s a free life (and DIY) lesson:
“To build upon anything, the foundation must be built first.”
If I’d followed that, I’d have built the frame first:
- Two 5′ 2x4s for the top and middle sections
- Two 4′ 2x4s for the sides
Then I could have attached the staves right onto it. But no… I went backwards.
Fixing My Backwards Build
Working in reverse, I used the top and bottom of my stave section as part of the frame, then added three more 4′ 2x4s (one in the middle, one on each end).
Using 2½” screws, I drilled two screws into each point where the new boards met the existing top and bottom. This took me:
- Two trips to Home Depot
- Five pieces of 2×4
- And more headaches than I care to admit

Another Hiccup
After letting the piece sit overnight, I noticed the frame looked… wonky. The 2x4s had pulled away from the staves. Naturally, I decided it was definitely the screws’ fault (and not mine).
My solution? Add one more 2×4 as a brace across the back. This extra support straightened things out — at least for now.
The Fun Part — Finishing Touches
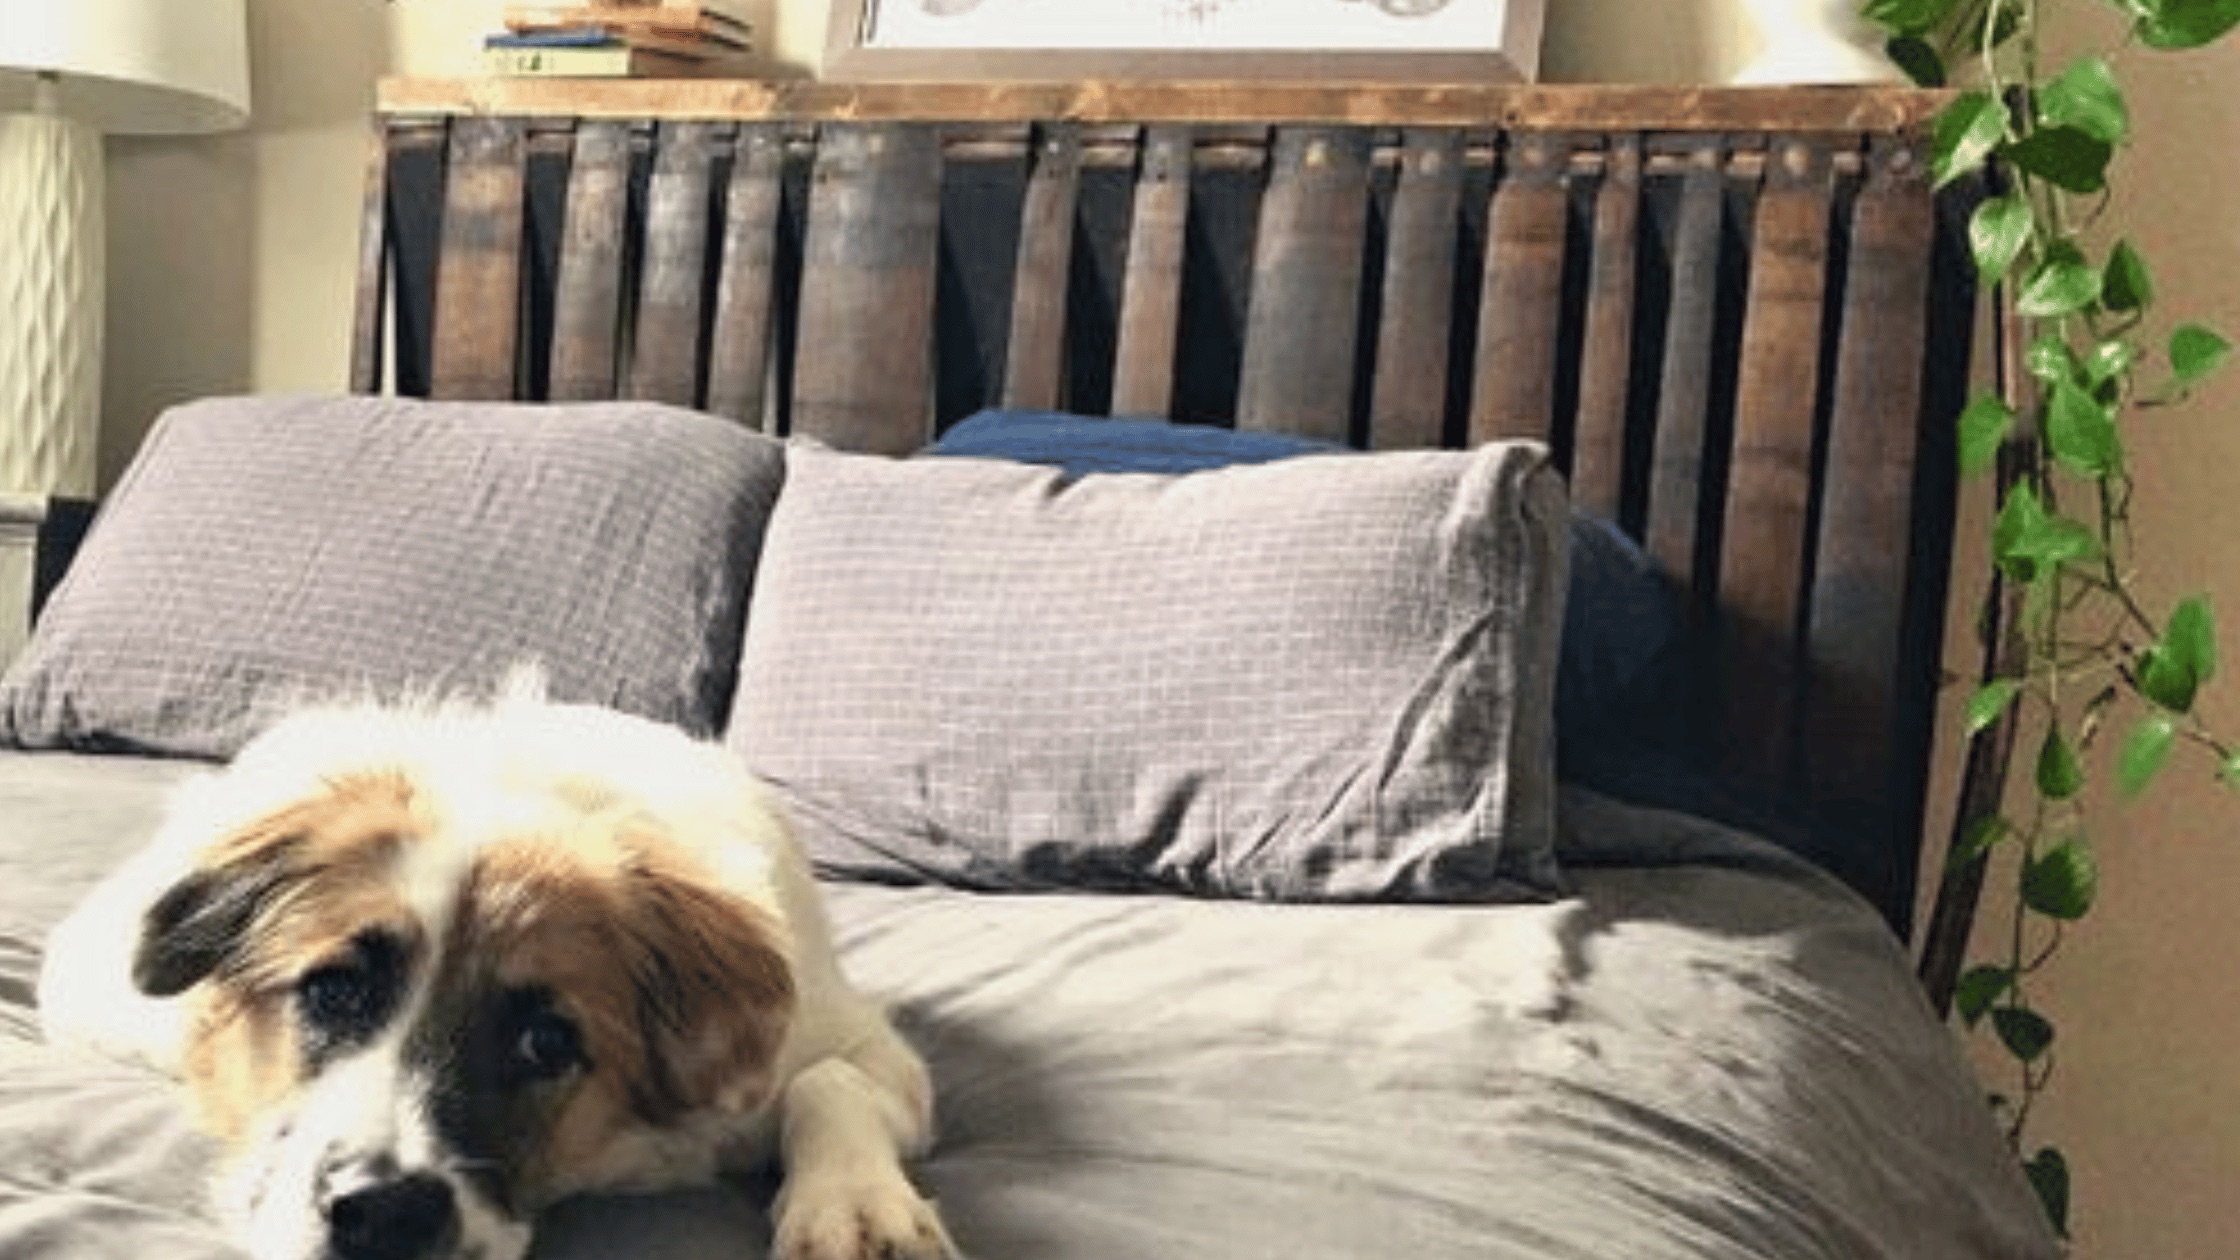
Once stable, I filled all the visible screw holes in the staves with wood putty, sanded everything smooth, and stained the whole piece with a dark walnut finish I’d used on a desk and shelves before.
From the front, it looked incredible. The curve of the barrel and the rich wood grain gave it a warm, rustic feel. Even with the detours, it was coming together better than I imagined.


DIY Whiskey Barrel Headboard
Equipment
- Power drill (with appropriate drill bits)
- Screwdriver (manual or drill attachment)
- Saw (if boards need cutting to size)
- Tape measure
- Sandpaper or power sander
- Clamps (to hold boards in place while drilling or gluing)
- Safety goggles
- Dust mask (for sanding)
- Paintbrush or staining pad
Materials
- (3) 2” x 4” x 5’ boards
- 2 2” x 4” x 4’ boards
- Whiskey barrel staves from a dismantled barrel
- 2 ” construction screws
- 3 ” construction screws
- Wood glue
- Wood putty
- Dark oak or walnut wood stain
- Clean cloth for wiping excess stain
Instructions
- Build the frame. Lay two 4' 2x4s parallel on the floor.
- Place two 5' 2x4s across them (top and middle) and attach with 3" screws.
- Add a 5' 2×4 flat across the top, securing it with wood glue, side screws, and top screws for extra stability.
- Attach the staves. Alternate the staves facing up and down under the top lip you just created.
- Secure each stave at the top and bottom with 2½" screws.
- Sand until smooth.
- Apply stain evenly, let dry 3 hours, and wipe off any excess.
- Install. Either attach the headboard directly to the wall or build a simple frame around your bed and secure it to that.
Final Thoughts
This wasn’t the fastest, easiest, or most straightforward project — but that’s the beauty of DIY. You improvise, adapt, and maybe mutter a few choice words at your power tools.
In the end, the Whiskey Barrel Headboard became one of my favorite upcycles: rustic charm, a good story, and a reminder that sometimes the “wrong” way still gets you to something great.
If you try this, make it your own — maybe even do it in the right order. And if you run into your own roadblocks, know you’re not alone… I’ve probably been there, muttering at screws, too.
